How to create FTP Account on windows server 2003.
Go to the 'Computer Management' tool under Start -> Control Panel -> Administrative Tools: Expand the 'Local Users and Groups' folder and right-click on 'Users' and select 'New User. 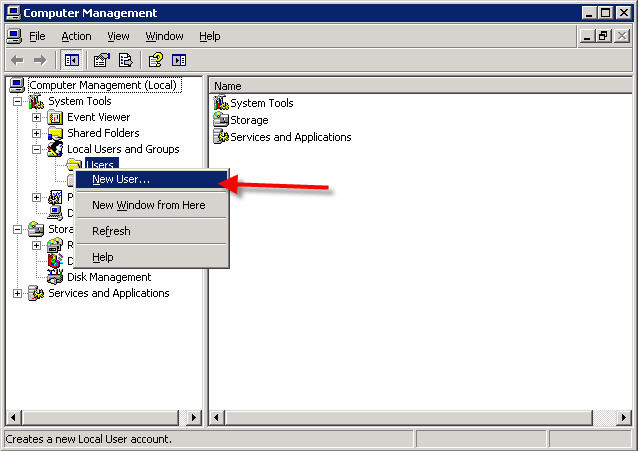 Fill in the information for your new user and then click 'Create': 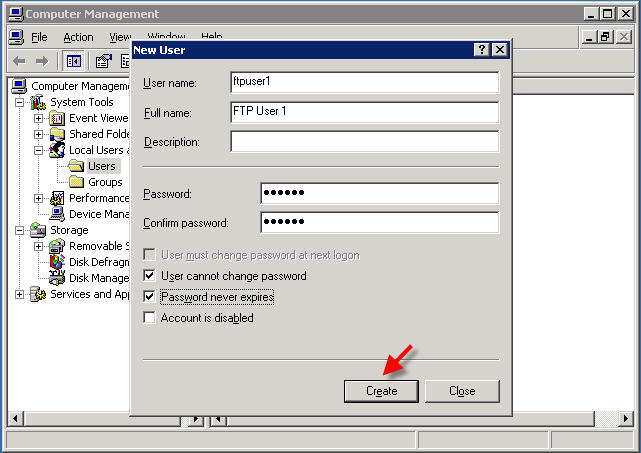 After you click 'Create' you will still be on the same screen (blank, so that you can add another user if needed). Press 'Close' to exit this screen. Now you will need to give this new user permissions for the folder, so navigate to the directory you would like the user to be able to access through the web or FTP. Right-click on the folder and click 'Properties': 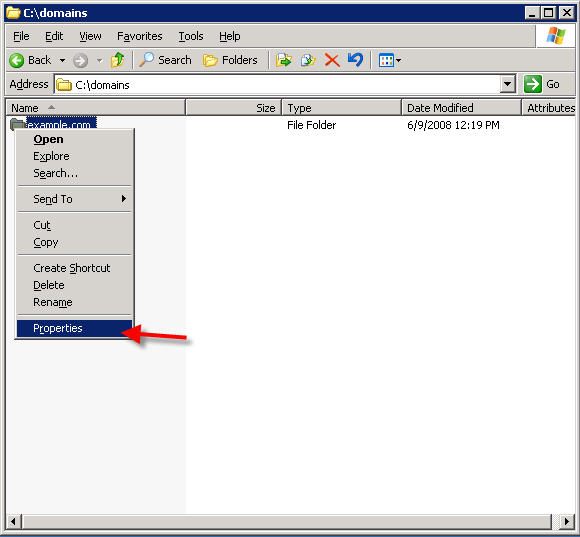 Now select the 'Security Tab' and click the 'Add' button: 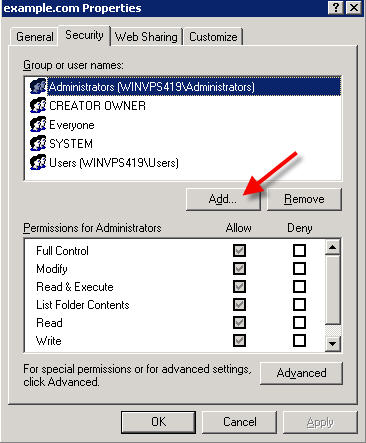 Click the 'Locations' button and select your server name (if it is not already listed) Type the name of your new user in the 'Enter the object names to select' box and click OK: 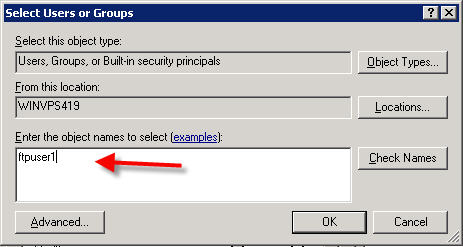 Then adjust the permissions that you want for this user by clicking on the appropriate check-boxes in the Permissions window, and press 'Apply'. Now click on the 'Advanced' button: 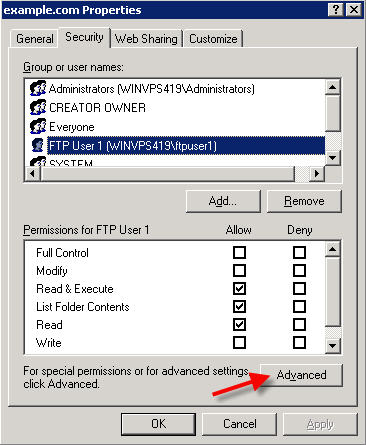 Make sure both check-boxes at the bottom are checked. This will reset all permissions on that folder and ensure that the new user has access to the files and folders inside that folder. Press 'Apply' to confirm. Now we need to create an entry under IIS so that the user can login through FTP. To create the Virtual Directory for the FTP user, open IIS and navigate to FTP Sites: 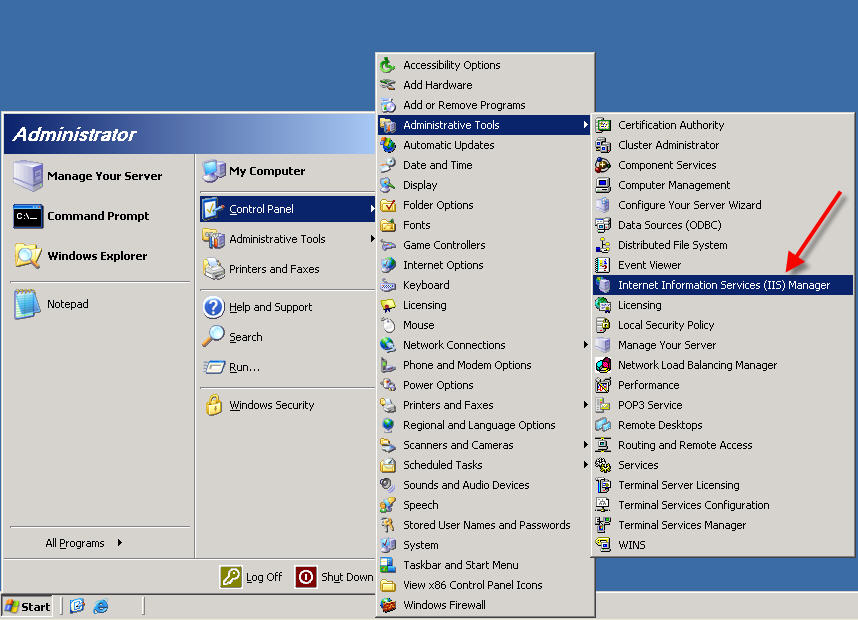 If your server has just been set up, we recommend that you disallow anonymous connections on the Default FTP Site: Expand the 'FTP Sites' folder and right-click on 'Default FTP Site' and select 'Properties': 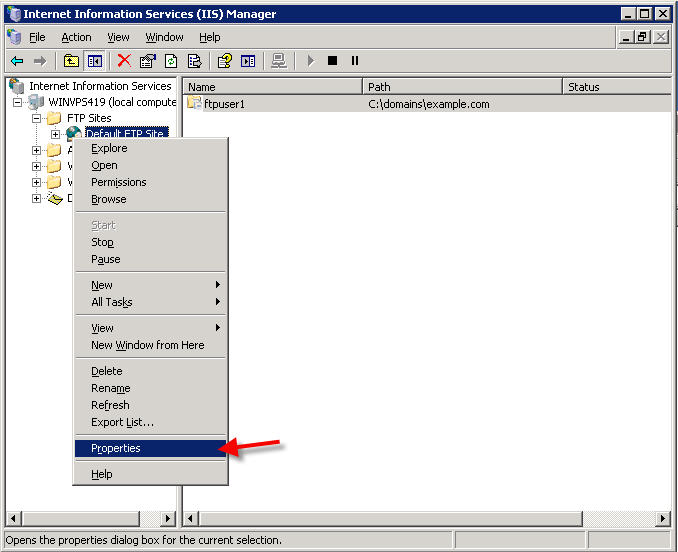 Click on the 'Security Accounts' tab, and UN-check the box 'Allow anonymous connections' 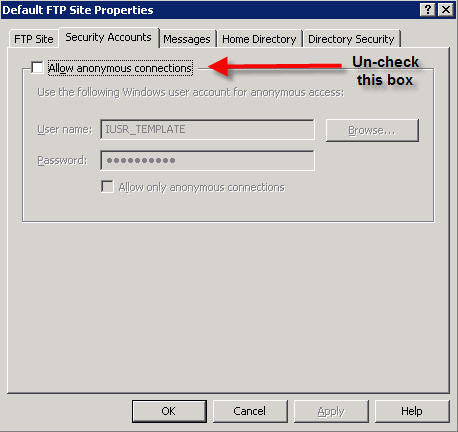 Press OK. Now you are ready to add FTP/Web users to your server: Right-click on the 'Default FTP Site' folder and select New --> Virtual Directory: 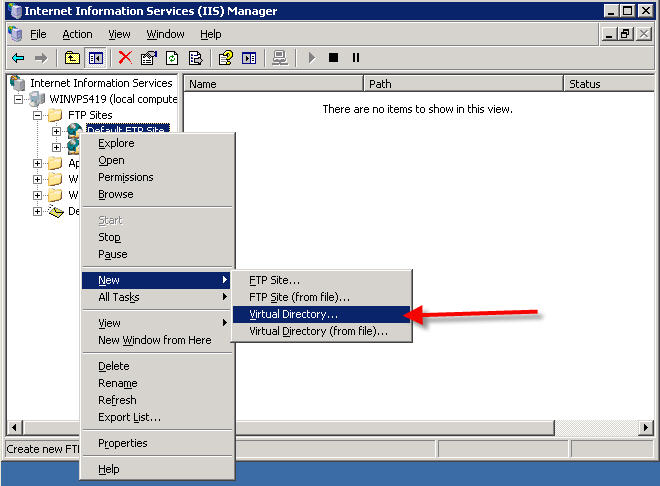 Follow the Wizard to complete the entry. Make sure that the alias of the virtual directory is the exact same name as the username you added earlier: 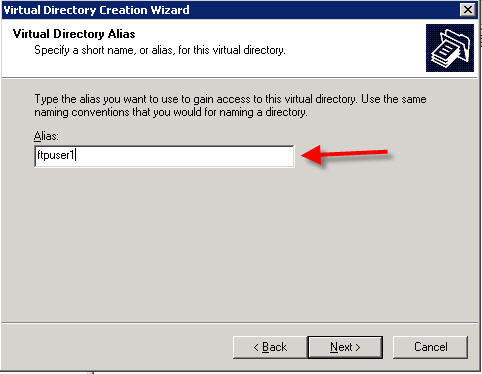 (In the above example we created a new user named "ftpuser1" so we are using the exact same name above) Click 'Next' Now just browse to the directory this FTP user should have access to. Normally this is the home directory for the web site: 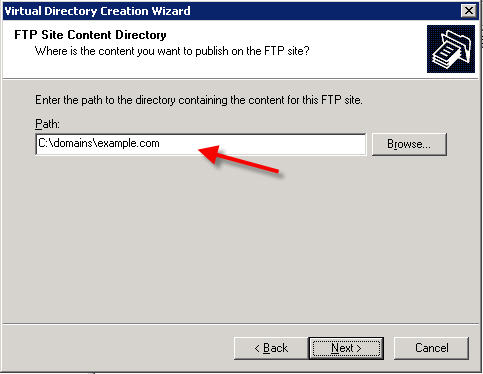 On the next screen, be sure to add a checkmark next to "Write" if you want your FTP user to be able to have access to upload/delete/modify files: 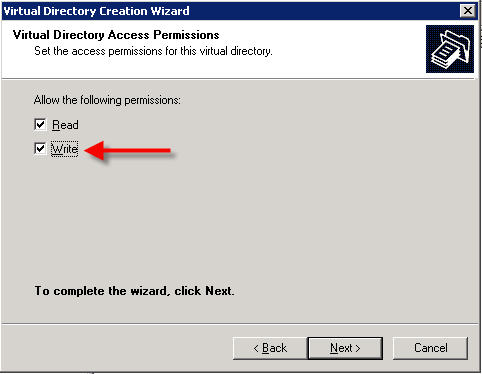 Click 'Next' and then 'Finish' |


0 comments:
Post a Comment